Spinning Up Easily Kubernetes Cluster on GKE
So you've read about Kubernetes and maybe Google Cloud Platform, but you've never spun up a cluster for yourself. Fret not. In this post, we'll take you through the basics, and by the end of it, you'll have a three node cluster up and running.
Create Your Google Cloud Project
If you don't already have a Google account, you must create one before you continue.
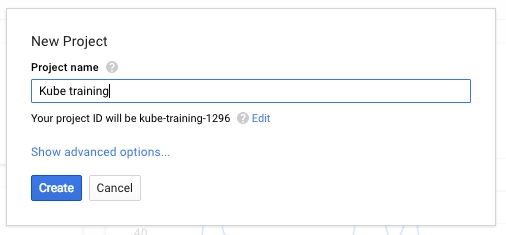
Sign in to your Google Cloud Platform console and create a new project:

Then pick the project name:

Note down the project ID. This is a unique name across all Google Cloud projects. Later in this post, we will refer to this as PROJECT_ID.
Next, enable billing in the console. You need this to access Google Cloud resources. Next, enable the Container Engine API and Compute Engine API. You must complete all three steps before continuing.
Running through this post shouldn’t cost you more than a few dollars. But it could cost you more if you decide to use more resources or if you leave them running. Check the Google Container Engine pricing for more information.
New users of Google Cloud Platform are eligible for a $300 free trial.
Introducing: Google Cloud Shell
While Google Cloud and Kubernetes can be operated remotely from your laptop, there is another way.
Google Cloud Shell (which is free of charge) is a browser-based command line environment running in the cloud. This Debian-based Docker container is loaded with all the development tools you’ll need: docker, gcloud, kubectl, and more. It offers a persistent 5GB home directory and runs on Google Cloud, greatly enhancing network performance and easing authentication hassles.
To activate Google Cloud Shell, select the project you want to work on from the Google Cloud Platform dashboard and then select the console button in the top nav.

It should only take a few moments to provision and connect to the environment.
Afterwards, you should see something like this:

Once connected, you are already authenticated:
$ gcloud auth list
Credentialed accounts:
- rimas@deis.com (active)
...
And the PROJECT_ID environment variable is already set for you:
$ gcloud config list project
Your active configuration is: [cloudshell-15211]
[core]
project = deis-training
Before we continue, let's update our gcloud components:
$ sudo /google/google-cloud-sdk/bin/gcloud components update
Note: Google Cloud Shell comes preinstalled with the Google Cloud SDK. If you want to use the SDK on your local machine, please review the quickstart guide for info.
Create Your GKE Cluster
Okay. With all that set up, now we can create a cluster.
There are two ways to create your GKE cluster: via the Cloud Platform Console or via the gcloud CLI. We'll show you how to do both.
We're using Google Container Engine (GKE) for both methods. If you'd like to know more about that, check out the docs.
Cluster Creation via the Cloud Platform Console
Let's go the visual route first.
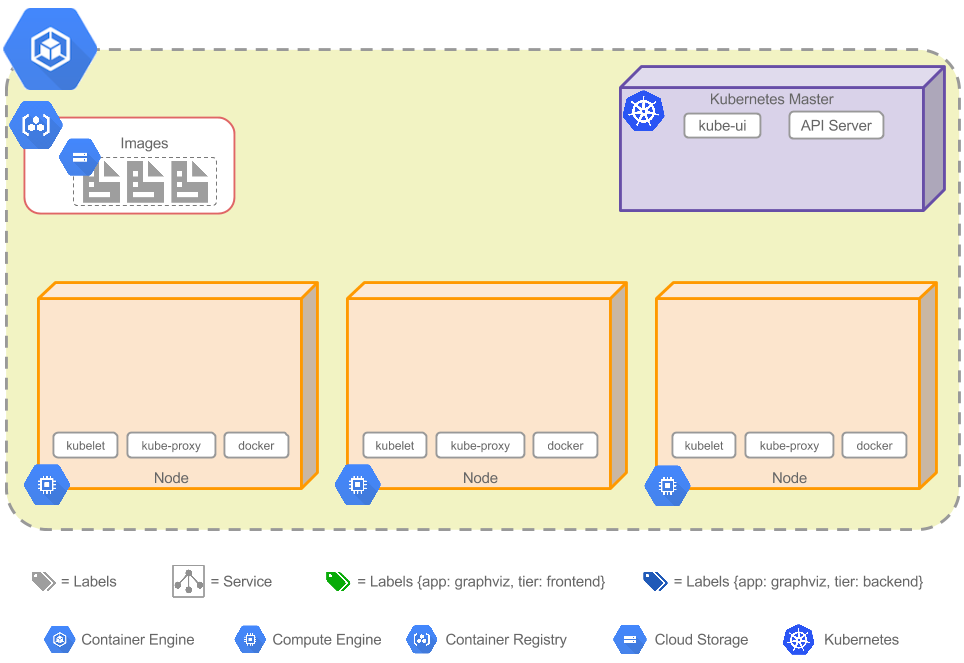
A cluster consists of a master API server hosted by Google and a set of worker nodes. The worker nodes are Google Compute Engine (GCE) virtual machines.
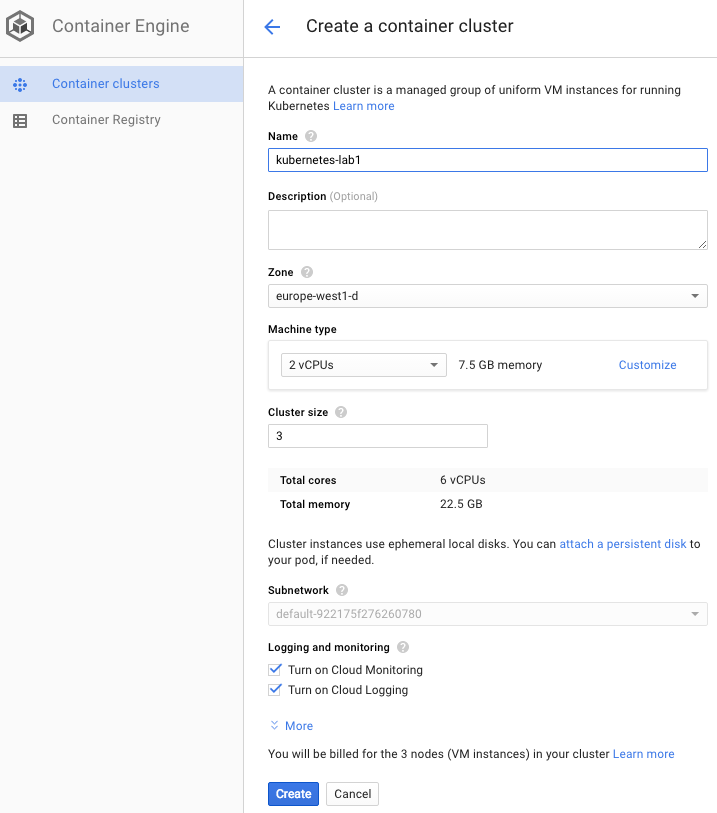
Let’s create a cluster with three n1-standard-2 nodes.
Go to your Container Engine page, which can be found via the hamburger menu in the top left. Next, go to Container clusters and select Create a container cluster.
You should then see this page:

Once you're done, select Create.
This will take a few minutes to complete.
When it's completed you should see something like this:

At this point, Container Engine has created a Compute Engine cluster with the Kubernetes platform installed.
The cluster now looks something like this:

For a refresher on what some of these terms mean, see my previous ground-up overview of Kubernetes.
The nodes are Compute Engine VMs, so we can see them in the console:

We can also SSH into them!
Note, however, that the Kubernetes Master is managed by Container Engine so you cannot SSH into that machine.
You now have a fully-functioning Kubernetes cluster, powered by GKE!
So. That's the visual route. What about the CLI?
Cluster Creation via the gcloud CLI
You can create a one-zone Kubernetes cluster on GKE with a command like this:
$ gcloud container clusters create kubernetes-lab1 \
  --disk-size 100 \
  --zone europe-west1-d \
  --enable-cloud-logging \
  --enable-cloud-monitoring \
  --machine-type n1-standard-2 \
  --num-nodes 3
To create a high availability multi-zone (one region) Kubernetes cluster on GKE, we can adapt that command a little bit.
Like so:
$ gcloud container clusters create kubernetes-lab1 \
  --disk-size 100 \
  --zone europe-west1-d \
  --additional-zones europe-west1-b,europe-west1-c \
  --enable-cloud-logging \
  --enable-cloud-monitoring \
  --machine-type n1-standard-2 \
  --num-nodes 3
Notice the new --additional-zones argument.
Both commands created a three-zone Kubernetes cluster with three nodes per zone. So, in total, nine nodes. All nodes share the same master, and workload will be spread evenly across all nine nodes.
Check the docs for more on the gcloud container clusters create command, or more on running Kubernetes in multiple zones.
Set gcloud Defaults
Let’s look at setting gcloud defaults in our cloud shell so kubectl knows which cluster to connect to.
Configure your PROJECT_ID like so:
$ gcloud config set project PROJECT_ID
Set a default Compute Engine zone like so:
$ gcloud config set compute/zone europe-west1-d
You can set a cluster as the default so you can omit the --cluster CLUSTER_NAME flag from future gcloud commands.
Do that like so:
$ gcloud config set container/cluster kubernetes-lab1
Also, fetch the cluster credentials for the kubectl tool:
$ gcloud container clusters get-credentials kubernetes-lab1
Credentials will be stored in ~/.kube/config.
Check this all worked:
$ kubectl cluster-info

Perfect!
Conclusion
We took a look at Google Cloud Platform, enabled billing, turned on the relevant APIs, and spun up a Kubernetes cluster on Google Compute Engine.
Don't forget to stop your instances once you've finished experimenting!