Introduction to Kubernetes, Part Two
In my previous post we looked at kubectl, clusters, the control plane, namespaces, pods, services, replication controllers, and labels.
In this post we take a look at at volumes, secrets, rolling updates, and Helm.
Volumes
A volume is a directory, possibly with some data in it, accessible to a container as part of its filesystem. Volumes are used used, for example, to store stateful app data.
Kubernetes supports several types of volume:
- emptyDir
- hostPath
- gcePersistentDisk
- awsElasticBlockStore
- nfs
- iscsi
- glusterfs
- rbd
- gitRepo
- secret
- persistentVolumeClaim
See the documentation for more on each of those.
For the purposes of this post, let's look at one of volumes types: hostPath.
A hostPath volume mounts a file or directory from the host node's filesystem into your pod. It can be used, for example, to provide HTML files for the my-nginx replication controller we made in the previous post.
Let’s update nginxrc.yaml with the volume config:
apiVersion: v1
kind: ReplicationController
metadata:
  name: my-nginx
spec:
  replicas: 1
  template:
    metadata:
      labels:
        app: nginx
    spec:
      containers:
      - name: nginx
        image: nginx
        ports:
        - containerPort: 80
	  # Mount volume into pod
        volumeMounts:
          # must match the name of the volume name below
          - name: shared-html
            # mount path within the container
            mountPath: /usr/share/nginx/html
	# volumes to be mounted to containers
      volumes:
      - name: shared-html
        hostPath:
          path: /somepath/shared/html
With the replication controller configured like this, the nginx container will serve HTML files from the host mounted volume.
This might work if you change the number of configured replicas, because /somepath/shared/html might not exist on other nodes. If you want to scale, you need to replicate files between Kubernetes nodes so they're always available. Or you use the NFS or GlusterFS volume types.
Secret
A secret is any piece of sensitive data, such as authentication tokens, encryption keys, SSL certificates, SSH keys, and so on. Secrets can then be made available to containers on request. Putting information in a secret is safer and more flexible than putting it in a pod definition or in a Docker image.
To use a secret, a pod or replication controller needs to reference the secret.
An example of secret manifest file:
apiVersion: v1
kind: Secret
metadata:
  name: mysecrets
data:
  password: dmFsdWUtMg0K
  username: someuser
Create this by running:
$ kubectl create -f mysecrecs.yaml
We can then mount this as a volume in our container:
...
        volumeMounts:
          # must match the name of the volume name below
          - name: my-passwords
	     readOnly: true
            # mount path within the container
            mountPath: /etc/my-passwords-volume
	# volumes to be mounted to containers
      volumes:
      - name: my-passwords
        secrect:
          secrectName: mysecrects
Our app can now consume passwords from the /etc/my-passwords-volume where two files now exist: username and password. If you read those files, you'll get the value you specified in your secret manifest. Simple.
If your app requires environment variables, one approach is to read in the content of these files and then set them as environment variables before starting your app.
For more information about secrets, see the documentation.
Rolling Updates
In the previous post, we looked at how to deploy pods via replication controllers. For this post, we're going to look at how to do a rolling update, which can, for example, upgrade a Docker image to a newer version.
Here's how you'd do that:
$ kubectl rolling-update my-nginx --image=nginx:1.9.10
Created my-nginx-2088ed66ed908b2434289b30bf3dafe3
Scaling up my-nginx-2088ed66ed908b2434289b30bf3dafe3 from 0 to 3, scalling down
Scaling my-nginx-2088ed66ed908b2434289b30bf3dafe3 up to 1
Scaling my-nginx down to 2
Scaling my-nginx-2088ed66ed908b2434289b30bf3dafe3 up to 2
Scaling my-nginx down to 1
Scaling my-nginx-2088ed66ed908b2434289b30bf3dafe3 up to 3
Scaling my-nginx down to 0
Update succeeded. Deleting old controller: my-nginx
Renaming my-nginx-2088ed66ed908b2434289b30bf3dafe3 to my-nginx
replicationcontroller "my-nginx" rolling updated
We just updated the pods controlled by our my-nginx replication controller by upgrading the Docker image. In other words, this deleted the old container and created a new one from a more recent image.
This can only be done when a replication controller is only responsible for one type of Docker image. If your replication controller is managing multiple different docker images, a new replication controller must be created.
For example, you could run:
$ kubectl rolling-update my-nginx -f nginxrc-v2.yaml
What this does is update the pods of my-nginx by using the new replication controller as specified in the nginxrc-v2.yaml manifest file. When the new replication controller is in place, the old one gets deleted.
You can read more about simple rolling updates or rolling updates of a replication controller in the docs.
Helm
Helm is the Kubernetes package manager.

We have learned how to install replication controllers and services on a Kubernetes cluster. You can write your these controllers yourself, or you can use controllers that have been pre-written and tested for you. This is where Helm comes in.
Helm lets you install charts. A chart is a unit of Kubernetes manifests. These charts, then, can be shared by the Helm community.
Let’s install Helm:
$ mkdir ~/bin
$ cd ~/bin
$ curl -s https://get.helm.sh | bash
You can check available commands:
$ helm -h
To start using Helm, first get the latest charts from Github:
$ helm update
---> Creating /home/user/.helm/config.yaml
---> Checking repository charts
---> Cloning into '/home/user/.helm/cache/charts'...Already up-to-date.
---> Done
Let’s search for a chart:
$ helm search weavescope
weavescope - Weave Scope chart
Weave Scope provides a visual map of your Docker containers. Read more on the official product page.
We can get more information about this chart:
$ helm info weavescope
Name: weavescope
Home: http://weave.works/product/scope/
Version: 0.1.1
Description: Weave Scope chart
Details: This chart allows to run Weave Scope on Kubernetes
And we can fetch the chart to our workspace:
$ helm fetch weavescope
---> Fetched chart into workspace /home/user/.helm/workspace/charts/weavescope
---> Done
Helm always saves a copy of the chart to the ~/.helm/workspace/charts/ directory.
So let's install the fetched Weave Scope chart:
$ helm install weavescope
---> Running `kubectl create -f` ...
service "weave-scope-app" created
replicationcontroller "weave-scope-app" created
daemonset "weave-scope-probe" created
---> Done
========================================
# Weave Scope
Using Weave Scope with Kubernetes:
https://github.com/weaveworks/scope#using-weave-scope-with-kubernetes
If you have a scope.weave.works account and want to run Scope in Cloud
Service Mode, comment out the line
"$(WEAVE_SCOPE_APP_SERVICE_HOST):$(WEAVE_SCOPE_APP_SERVICE_PORT)"] in
scope-probe-ds.yaml manifest and uncomment the line below, replacing
"foo" with the Service token which you will obtain when logging in to
your scope.weave.works account: "--probe.token=foo"]
DaemonSets need to be enabled in Kubernetes cluster and all node hosts
are run with the Docker socket at /var/run/docker.sock
========================================
Let's check the replication controller is working:
$ kubectl get rc weave-scope-app
NAME              DESIRED   CURRENT   AGE
weave-scope-app   1         1         8m
Cool. Now we can check the daemon sets are working:
$ kubectl get ds weave-scope-probe
NAME                DESIRED   CURRENT   NODE-SELECTOR   AGE
weave-scope-probe   3         3         <none>          10m
Weave Scope works on port 4040, but that port is not exposed to us. So let's forward the local port to remote port so we can access it from our laptop remotely.
Get the pods list:
$ kubectl get pods
NAME                          READY     STATUS    RESTARTS   AGE
weave-scope-app-k8m4k         1/1       Running   0          23m
weave-scope-probe-b5jh7       1/1       Running   0          23m
weave-scope-probe-psit2       1/1       Running   0          23m
We're interested in the weave-scope-app pod.
We can add a port forward like so:
$ kubectl port-forward weave-scope-app-k8m4k 4040:4040
I0428 18:43:37.014631   14389 portforward.go:213] Forwarding from 127.0.0.1:4040 -> 4040
I0428 18:43:37.015420   14389 portforward.go:213] Forwarding from [::1]:4040 -> 4040
And now you can open http://127.0.0.1:4040 your browser.
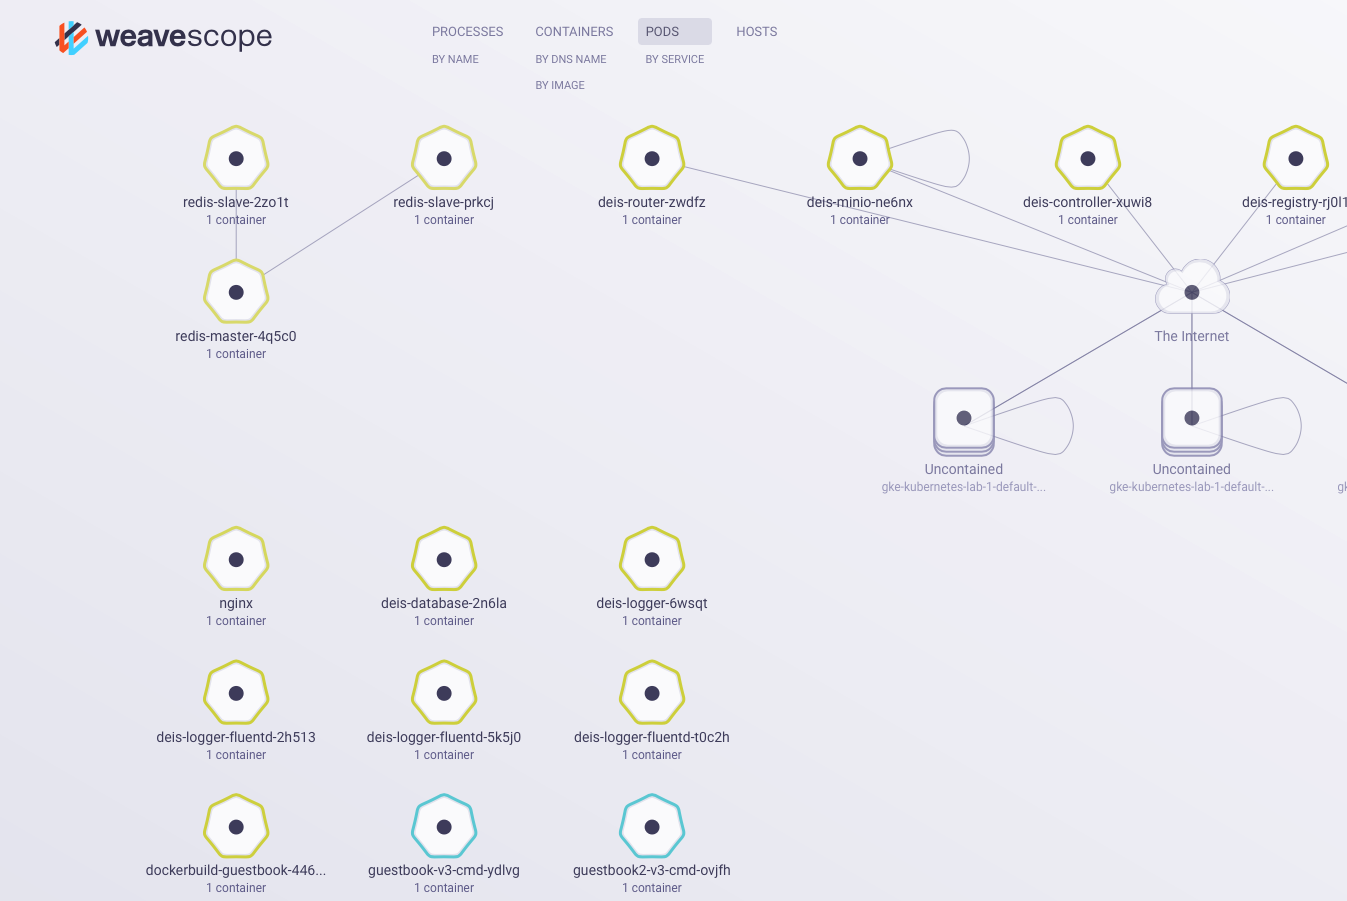
You should see WeaveScope UI:

Great. Everything is working!
If you later want to uninstall Weave Scope, you can do so like this:
$ helm uninstall weavescope -n default
Conclusion
In part two of this Kubernetes miniseries we looked at volumes, secrets, rolling updates, and Helm. Helm is the package manager for Kubernetes, and makes it much easier to install and manage Kubernetes manifest files.